Lawson
Fashion PLM Administration
All of the setup required to access, share, and work within Fashion PLM is done in the Administration module. Since this module is a separate application, only users with the proper access rights can access it. These users are called Administrators.
Within the Product Manager framework, there exists a Master Company with locations and users. It is important to differentiate what each component does and how they all interact together.
Administrative tasks tend to be divided between the Master Company and the Divisions of the company. The Master Company Super Administrator sets up the company profile, creates Divisions and Business Partners, and assigns Division Administrators.
A Division Administrator may be a Team or Brand Administrator and may administer any or all divisions. Upon installation of the system in a company, a Master Company is automatically created with a default headquarter and a default Super Administrator user.
There are nine types of companies: Brand, Retailer, Brand and Retailer, Agent, Factory, Trim Supplier, Fabric Supplier, Vendor, and Mill. The Master Company will be created by Lawson. A Master Company can be a Brand, a Retailer, or a Brand and Retailer. This company may have Locations and Users and will share information internally or with other companies.
Any company outside of the Master Company is considered a Business Partner. The Master Company Super Administrator can create new Business Partner companies. Business Partner Administrators and Team Administrators can create and update Locations and Users for their company.
Divisions can mean different things for every company. In Fashion PLM, divisions are used when companies have more than one business with separate business processes. By creating divisions companies can define a specific set of forms for Product Manager allowing for different information to be entered for each business while still sharing a common database.
All companies can have many physical locations. A Location can correspond to either a branch office or a manufacturing location. The sourcing location associated to the Master Company will be used as an Office and products can be released to the specified Locations.
Only released products will be available to be viewed by Business Partner Locations associated to a folder containing the products (only selected Vendor Location, Office, Agent Location will have access to the released product).
All Users are directly associated with a company through their association to a Location. Users must be associated with at least one Location.
The first user created within the Master Company is the Master Company Administrator. This user’s access cannot be modified and it cannot be deleted. The first created user of a Business Partner company added by the Master Company will always be an Administrator. There must always be at least one Administrator within a company. The Administrator in a company has implicit access to the company administration (My Company, Locations, Users).
User Names must be unique and must be at least 6 and up to 50 characters in length. Passwords are required to access the system. Passwords are verified upon creation or modification and must be at least 6 characters in length.
The Setup ID Fields section of the Administration module is used to define rules for the auto-generation of selected identification numbers.
These system generated numbers can be comprised of a fixed string of characters (alphanumeric) which can be made up of various fields. For example, in Product Manager, a system generated number could be created for the Product number using the Division, Product Type, and Size Category fields. The result could be Wmn-Skts-Missy.
The auto-generated part of this system-generated number can also be specified to begin at a certain number, the increments and leading zeros can be defined, as well as resetting the numbers per season and year. In the example above, the fields would create the alpha part, while the numeric section could be defined to begin at 1 with two leading zeros and an increment of 1. Therefore the first product created would be Wmn-Skts-Missy-001. The second product created would be Wmn-Skts-Missy-002.
Use the Structure section of the Administration module to create the hierarchy for the various modules of Fashion PLM.
The Product structure will control the company’s folder hierarchy for storing products.
The Fabric structure will control the company’s folder hierarchy for storing fabrics.
The Trim structure will control the company’s folder hierarchy for storing trims.
The Storyboard Template structure will control the company’s folder hierarchy for storing storyboard templates.
The Line Optimizer Folder View structure will control the company’s folder hierarchy for storing Line Optimizer Folder View storyboard templates.
The Workflow structure will control the company’s folder hierarchy for storing activities and workflows.
The Library Structure controls the structure for color, fabric, trim, style, and task templates.
The Smart Grade structure allows you to store the various grade rules you will create for your products.
The Operation List structure allows you to store labour-related costs.
The Standards structure allows you to store your Fabric and Trim testing standards.
The Catalog and Spread structures structure will control the company’s folder hierarchy for storing catalogues and spreads in Line Optimizer.
Security in Product Manager is controlled at the Role level. Roles control access levels (None, View, Edit) to different tabs (or sections), as well as different areas within a section (BOM, Colorway, Specifications, Costing, etc.) that a user may have.
The Smart Grade section of the Business Process Management is a critical part of product specifications. You can create, store and modify specific grade rules for Product Types, Size Categories, and Size Ranges.
The Operation List section allows you to enter labour time and cost information for sewing or pressing tasks that factor in to the overall cost of your product costing.
The Standards section is used with Fabric & Trim and comes loaded with industry standard tests. You may add new tests and create your own Performance standards by grouping selected tests together.
The Configuration section of the Administration module allows you to set up your configurable forms, form sets, items types, print templates, print sets, and reports.
Configurable forms allow you to create your own variations of our forms, with such flexibility as changing field names, size, and positions. Add fields or hide fields, while controlling access to all fields and even defining access by division.
Item Types are a combination of product, template information and associated Form Set. A Form Set is a predefined set of forms that can be selected and saves your users the extra steps of adding forms individually to products.
Print Templates allow you to set up print information. When printing, you may want information to be printed differently than it appears on screen. You may also select to print different information depending on access rights, forms, applications, etc.
The Print Sets section allows you to group your Print Templates. You can select which forms to print as well as define access rights per division ensuring that your teams can execute standardized print jobs quickly and efficiently.
Workflow administrative tasks are part of Fashion PLM and are linked to the administration of other modules such as Product Manager. User creation and business partner creation, as well as folder structure, are executed in the same screens used for all the other Fashion PLM modules.
Using the Reporting module, you can setup general reports which can be used in all Fashion PLM applications, or configure module specific reports that are only available for selected Fashion PLM applications. Item reports can also be created and printed from an item.
Using Manage Fields, create User Fields, configure your drop-down lists, sort list items, rename items, create dependencies between fields, and add filtering between lists and items.
The Manage POMs section of the Data Dictionary allows you to build up a library of points of measure and How to Measure images, which are then associated to product classes. this saves time and ensures consistency in your samples, as your business partners get familiar with the same points of measure.
Manage Operations allows you add operations to calculate labor-related costs for product costing.
Use Size Ratio to create size ratios that can be used in the Color Matrix window when creating Cost Requests in Product Manager.
Vendor Management Templates and Fields are used to set up templates used by vendors in Source.
User and Company Name Validations
To avoid confusion and ensure data integrity, a certain level of uniqueness needs to be enforced for specific fields.
• Company Name - must be unique in the system. It cannot match another Master Company Name or Business Partner Name.
• Location Name - must be unique within its own company.
• Division Name - must be unique in the system.
• User Name - must be unique and must be at least 6 and up to 50 characters in length.
Passwords are required to access the system. Password are verified upon creation or modification and must be at least 6 characters in length.
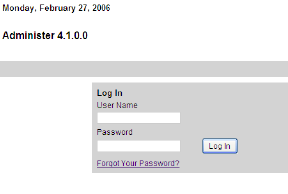
1 Enter the Administration URL in your browser window. The Log In page opens (Figure 1).
2 Type your User Name.
3 Type your Password.
4 Click Log In. The Administration page opens. See “Administration” on page 9 for more details.
1 If you have forgotten your password, click the Forgot Your Password? link. The Forgot Your Password page opens.
2 Type your User Name, then click Continue. A temporary password has been sent to your email address.
3 Return to the Log In page to log in with the temporary password. The Change Your Password page opens.
4 Enter and confirm a New Password.
5 Click Continue. The Administration page opens. See “Administration” on page 9 for more details.